What is NodeMCU?
NodeMCU is actually the name of a firmware developed to program ESP8266 with the Lua language. Since such Dev Kit cards are very popular, these cards are called NodeMCU for short.
Since NodeMCU is an open source platform, the hardware design is open to editing, modifying, and rebuilding.
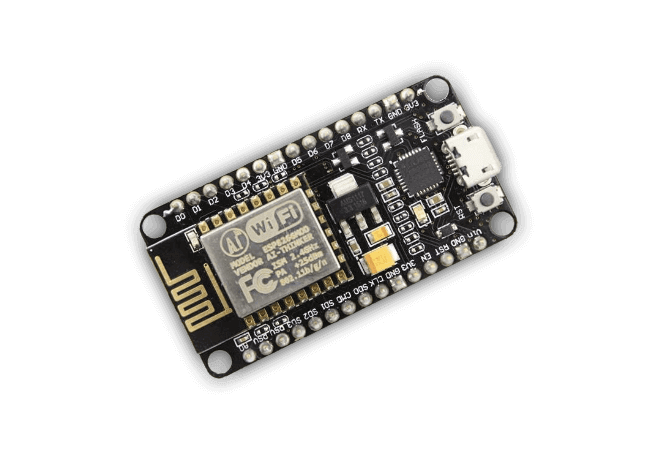
The NodeMCU Dev Kit/board consists of the ESP8266 wifi-enabled chip. The ESP8266 is a low-cost Wi-Fi chip developed by Espressif Systems with the TCP/IP protocol.
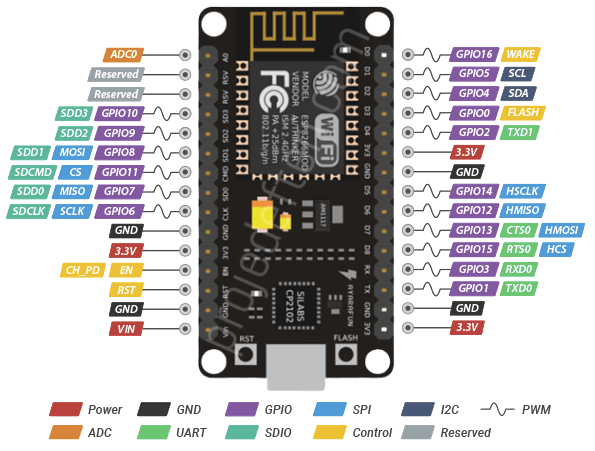
NodeMCU Schema
What to do with NodeMCU?
We can do projects that work with the NodeMCU card internet. For example, imagine that you are outside, and you want to turn on the lights in your home, which you can do with NodeMCU or you can do everything you can think of, such as temperature and humidity control, roll control, plant irrigation.
If you have a device connected to the internet, you can control it with NodeMCU from anywhere in the world.
We call it IoT, the Internet of Things. Today, it provides benefits in all kinds of systems and many areas, from urbanism to small household appliances.
How to Add NodeMCU to Arduino
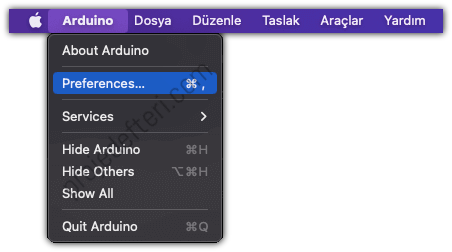
Click Arduino IDE > Preferences menu. (For Mac ↓)
Paste this link into the Additional Circuit Board Manager URLs section at the bottom.
https://arduino.esp8266.com/stable/package_esp8266com_index.json
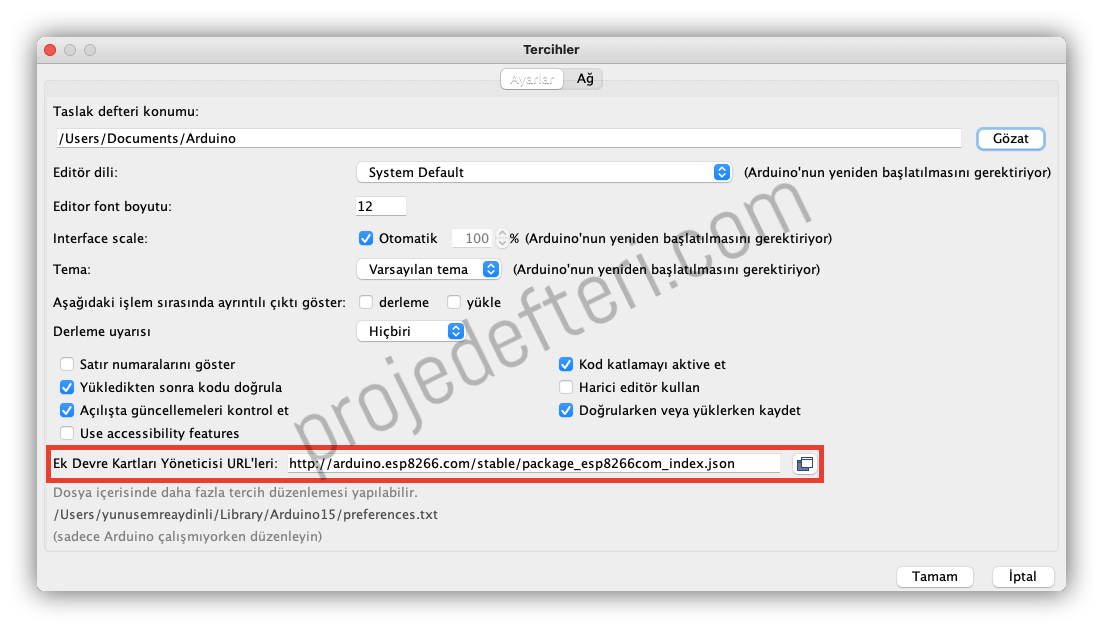
Click OK and exit.
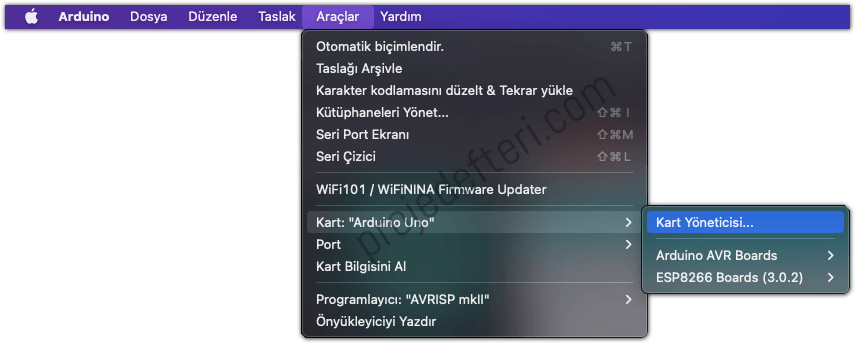
Click Tools > Board > Boards Manager….
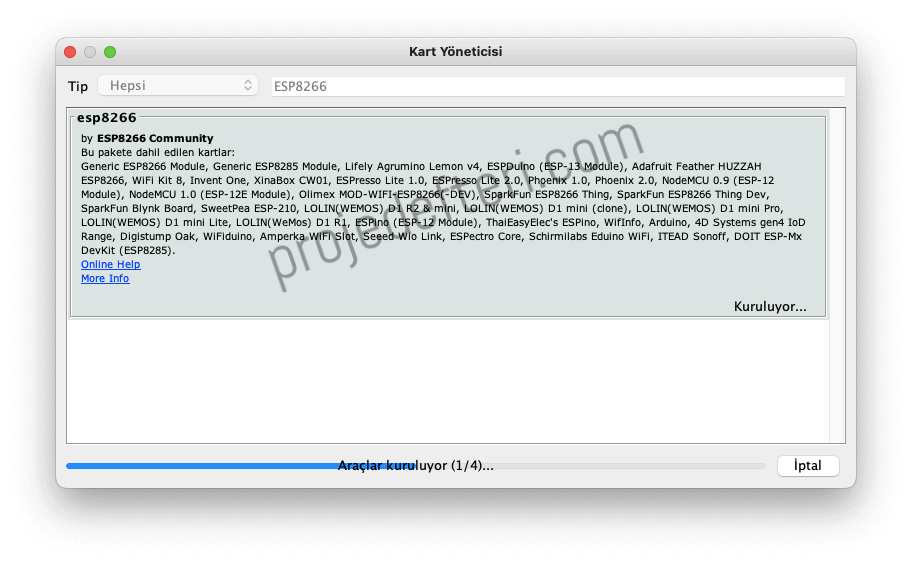
Type ESP8266 and search for it and install the library below. When the installation process is complete, restart the Arduino IDE.
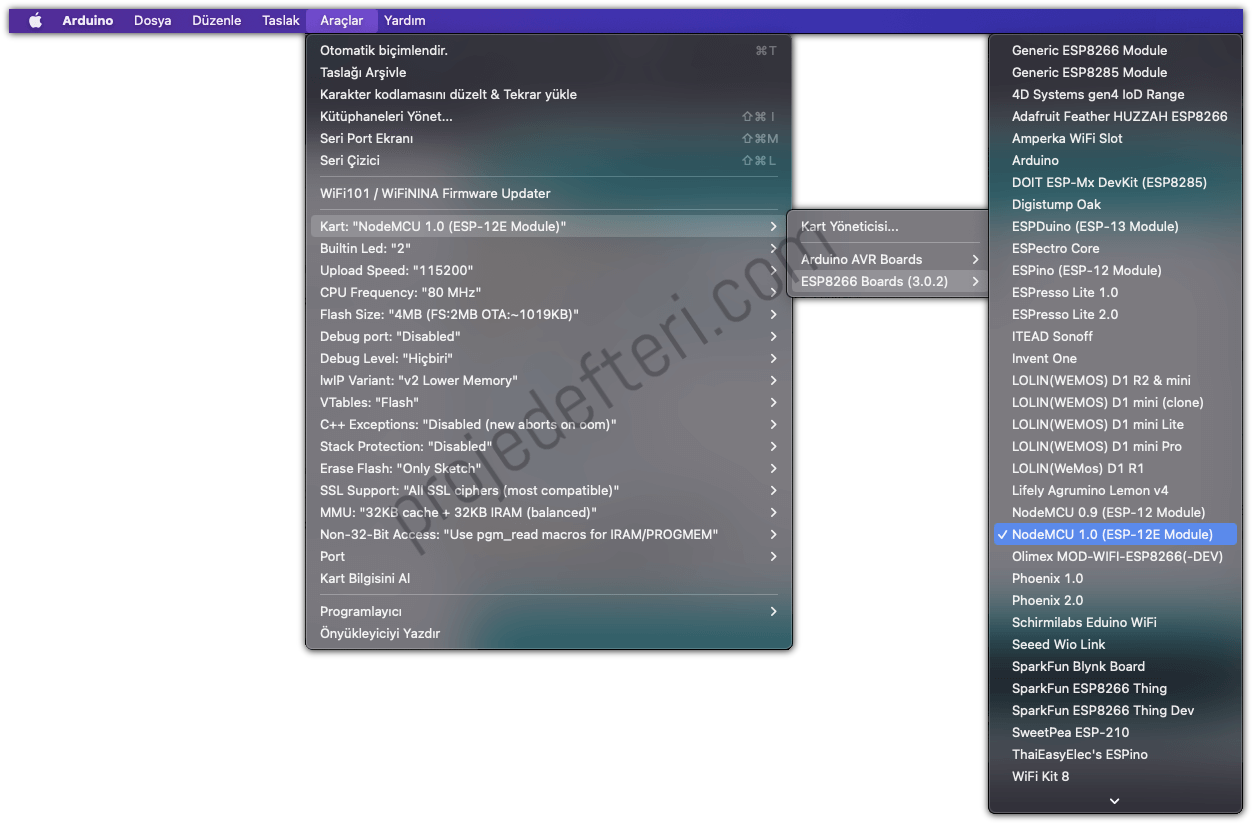
Select Tools > Board > ESP8266 Boards (3.0.2) > NodeMCU 1.0 (ESP - 12E Module). Do not forget to make your port selection!
We completed successfully the setup process. Now you can code NodeMCU! 🙂 If you have any questions or problems, you can write them down in the comments. Don’t forget to write your opinions about the blog! 😊 Good codes!