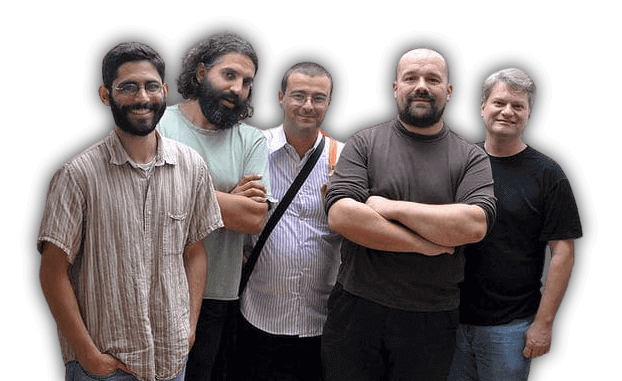
The Arduino project began at the Institute for Interaction Design Ivrea in Ivrea, northern Italy. Arduino was founded by Massimo Banzi, David Cuartielles, Tom Igoe, Gianluca Martino and David Mellis. They built the first Arduino using a $100 BASIC Stamp microcontroller.
Here is the Arduino team that gives hope to those new generations:
In 2003, under the supervision of Hernando Barragán, Massimo Banzi and Casey Reas, he created the Wiring development platform as a master’s thesis project at IDII. Initially, the goal of the project was to make simple, low-cost tools for creating digital projects by non-engineers.
The Wiring platform consisted of a printed circuit board (PCB) with ATmega. 168 microcontrollers, an IDE based on processing and library functions to easily program the microcontroller. This new project, forked from Wiring, was called Arduino. The name Arduino comes from the name of an Italian medieval king named Arduin of Ivrea.
Here are the first photos of the Arduino:
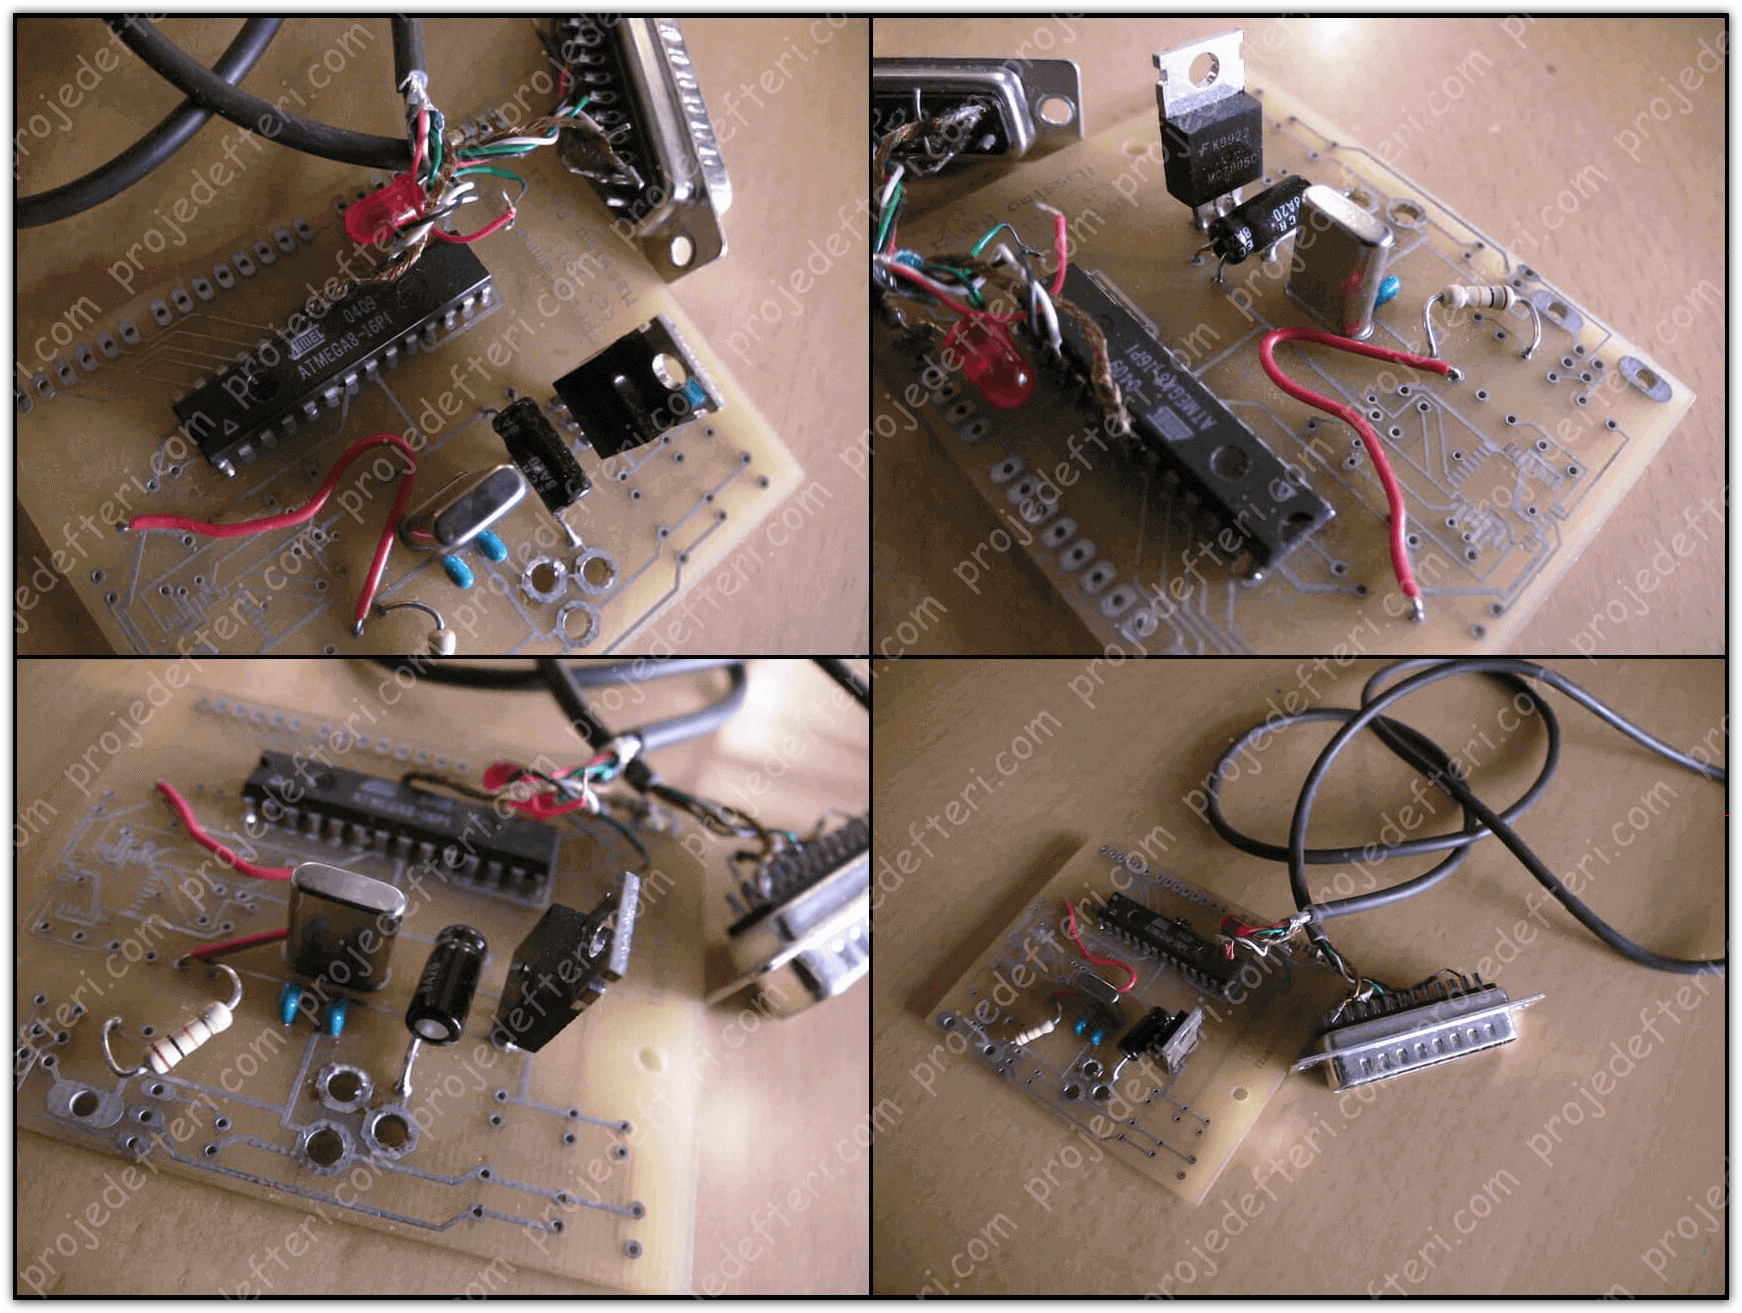
These photos are from the first Arduino from 2005. Massimo (co-founder of Arduino) has a Flickr photo set from 2004 that also includes some production photos and some prototypes. Check it out here. 😀
Arduino Documentary
You can watch the documentary prepared for Arduino. 🙂
Arduino Hardware
Arduino is open source hardware. Diagram, PCB, Code, etc. everything is accessible. The same is true in Arduino Software, that is, Arduino IDE. Windows, macOS, and Linux operating systems include the Arduino IDE. You can click here to download it.
Although it is freely available under hardware and software designs, it has a copyleft license, so if I make an Arduino, I have to do so provided that I retain the right to freely distribute and modify it, the same rights in derivative works created from this Arduino.
For developers, the Arduino name is exclusive, as we cannot use the official product and for permissionless, derived work. In the official policy document on using the Arduino name, he said that the project was open to incorporating work done by others into the official product.
On the plain point, although Arduino is open source hardware, in the projects we have done in the Arduino genre, we have been prevented from using the name Arduino, but Arduino products that are commercially available are created using various names that begin and end with Ardu- or -duino. You have surely seen Arduino varieties with such names. 🙂
The Arduino development environment is based on the software of the language called Processing and is very similar to it. You can access the GitHub repos of Arduino developed in Java from here. If you know Java, you can also make the changes you want to the Arduino software.
Arduino’s microcontrollers are pre-programmed with a bootloader that makes it easy to load programs into flash memory on the chip. Almost all modern Arduino boards use an Optiboot bootloader. It can be a bit confusing, no problem. We’ll take a look at the Optiboot and the Atmage card in detail in a moment, but before that, let’s examine the hardware parts on the Arduino if you want.
Arduino Hardware Design
All new Arduino boards mostly use the Atmega328 chip. The first two digits in the model number are the size of the flash memory in kilobytes, so the Atmega 328 has 32 kilobytes of flash memory. This size may sound small, but it’s enough for most hobbyist projects.
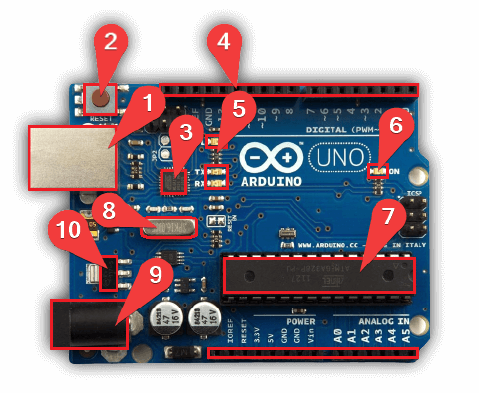
Let’s take the Arduino UNO and explain the parts of its hardware in order:
- USB interface (Connects to our computer from here.)
- Reset Button (Known button)
- USB-RS232 converter integrated (Arduino circuit boards work with USB, as most new generation computers do not have serial port input.
- 2.54mm spaced female header connectors (it can make connections from here, you can install them on shield cards to correspond to these connectors.
- Pin13 LEDs and TX/RX LEDs (Pin 13 LEDs: Cute LEDs 😊 that make bidi-bidi when communicating with Arduino computer)
- Power LED (Lights up when it receives energy.)
- The ATmega chip (Amiyane is the brain of the Arduino. For detailed information about the Atmel chip, see this blog.)
- Crystal (Here is the heart of our circuit, vibrating 🙄 16 million times per second.)
- DC Supply (If you connect parts by drawing more than a few hundred milliamperes load from the Arduino, you need to feed from here. If you are in the development stage, it will be enough to feed from USB. That’s just their difference.
- 5V Regulator integration (Model 7805)
Optiboot
From here, you can check out the Optiboot section. (It’s short, and I think you should read it. There is a lot of interesting information!) 😊
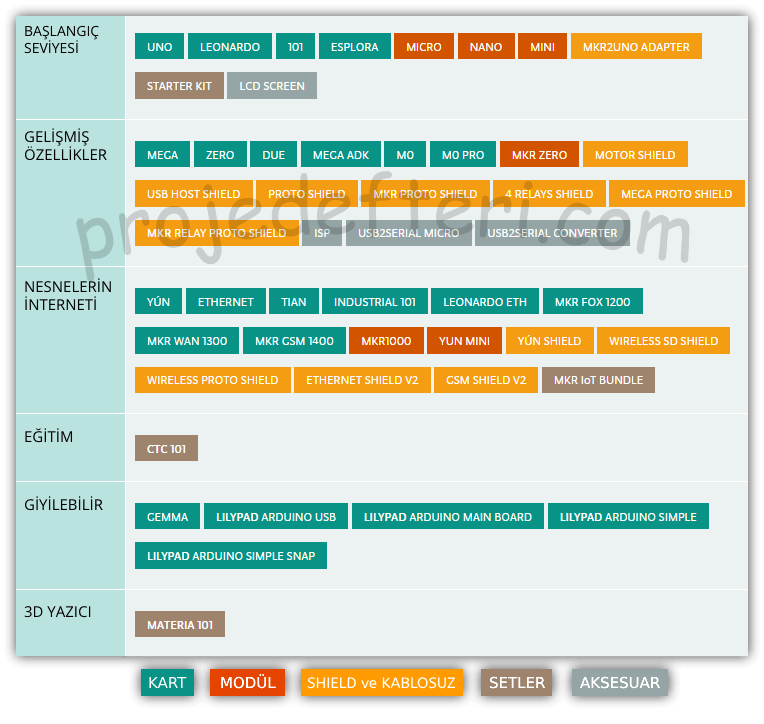
Arduino Types
Entry-level, advanced cards, internet of things cards, education cards, and wearable cards are available. You can review it below.
Introducing the 3 Popular Arduino boards and their features:
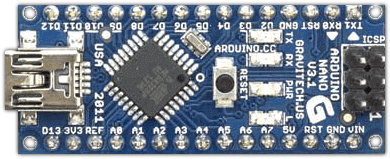
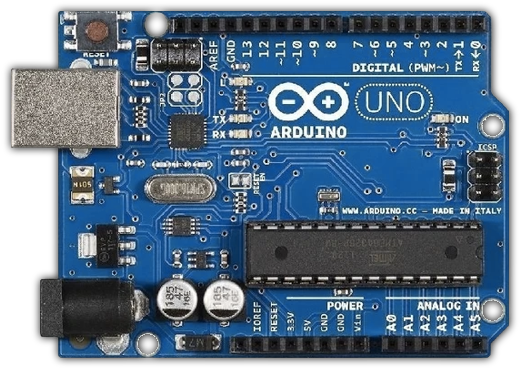
1. Arduino UNO
There are 14 digital input/output pins. We can use 6 of them as PWM outputs. There are also 6 analog inputs, a 16 MHz crystal oscillator, USB connection, power jack (2.1mm), ICSP header, and reset button.
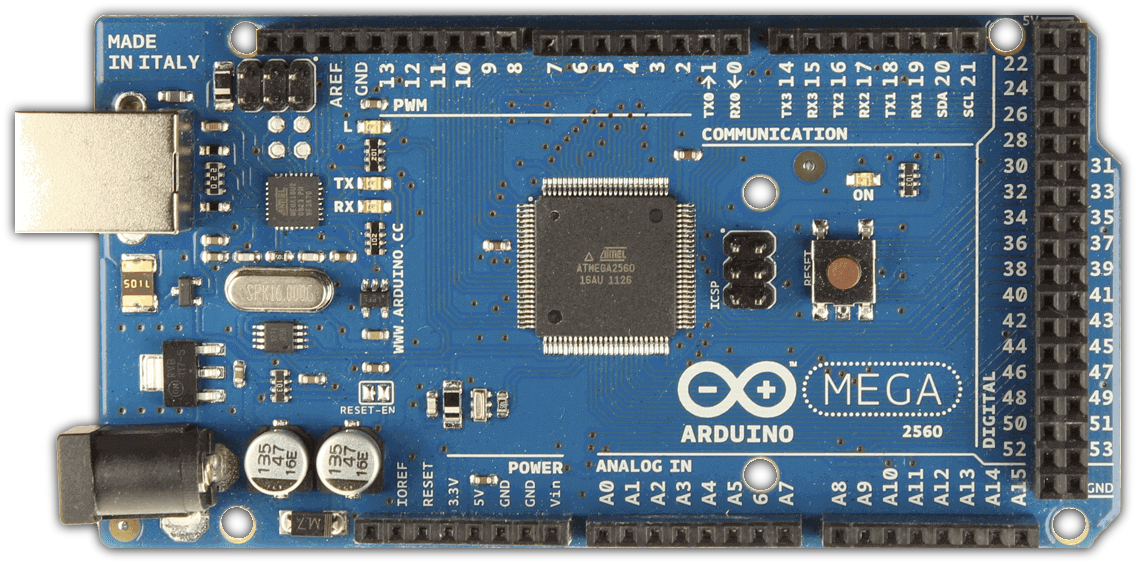
2. Arduino Mega
There are 54 digital input/output pins. We can use 15 of them as PWM outputs. There are also 16 analog inputs, 4 UART (hardware serial ports), one 16 MHz crystal oscillator, USB connection, power jack (2.1mm), ICSP header and reset button.
3. Arduino Nano
There are 14 digital input/output pins (6 of which can be used as PWM output), 8 analog inputs, 16Mhz crystal, usb socket, ICSP connector, and reset button.